

In today you will see how we can divide the disc and how to extend the disk space.
Sometimes we have to create different folders for our files to be filled in the category, but if ever the disk gets deleted, all our files and folders will also be deleted.
So to avoid this, we divide hard disks into pieces. Another advantage of this is that the computer speed also increases.
You can follow these steps and in what way you can delicate how and how to merge the disc, in all this I will tell you in this article.
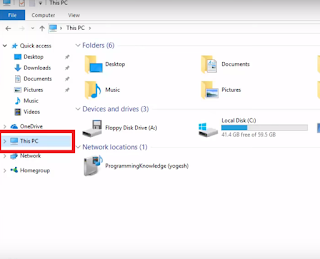
Step 1:
According to the first image, first go to Start and open the file explorer.
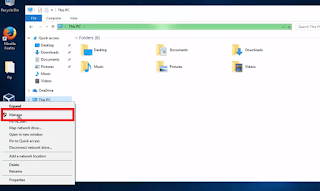
Step 2:
Then right click on this PC according to the image given below
Step 3:

After the right click you will see the option of the property, you can see in the image
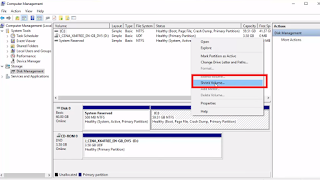
Step 4:
And as soon as you click on the properties you will be seeing in the image of a disk management option, click on it

Step 5:
Here you will see all the disks, you will select any disk you want to partition, or right click on that disk.

Step 6:
After the right click you will see the option of the shrink volume. Simply select it, as shown in the image.
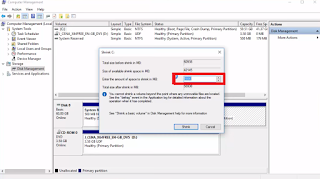
Step 7:
After this, select as much space as you need from the available space and proceed.
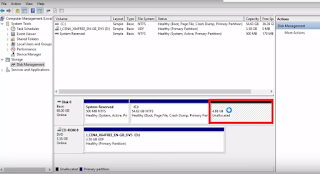
Step 8:
You can see here in the image below the Unalocated disk is ready
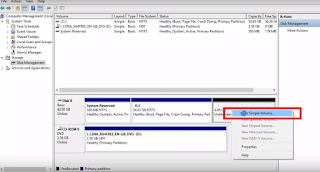
Step 9:
Right click on the unallocated disk. You will see a new volume option right upwards. You click on it. or follow the next steps.


Step 10:
Simpy click the next button you can see it below image.

Step 11:
Change the size of your disk ,you can see that minimum or maximum size of available disk

Step 12:
you select the disk type (like ,E,F ,G,H..) and click next button .

Step 13:
Click Next

Step 14:
You can see that your disc has been made, you can check it in this PC

Step 15:
You can see it

Step 16:
But if you want to delete a disk, then go back to that disk again and right click on it. You will see the option of the delete disk here, select it.

Step 17:
You are being asked if you want to delete or not. But remember once you get deleted, you will not be able to access any file or folder on that disk.

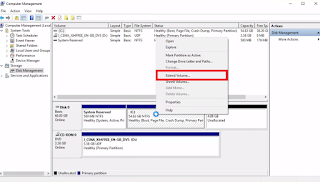
Step 18:
You can see the disk is empty. Now select the one you want to merge this disk with and right click

Step 19:
After right clicking, you will see an option with extended volume, you have to select Simply according to the image given below and reach the next step.

Step 20:
Click Next Button

Step 21:
As soon as you click next, both of your disks will be merged.


1 Comments
Cute
ReplyDelete